I just wanted to share a little trick I use for preparing images for the web. This is super handy if you are uploading screenshots or photographs to your site on a regular basis.
- This guide requires a Mac using any vaguely modern OS.
- First make sure you have ImageOptim installed in your Applications folder (its free)
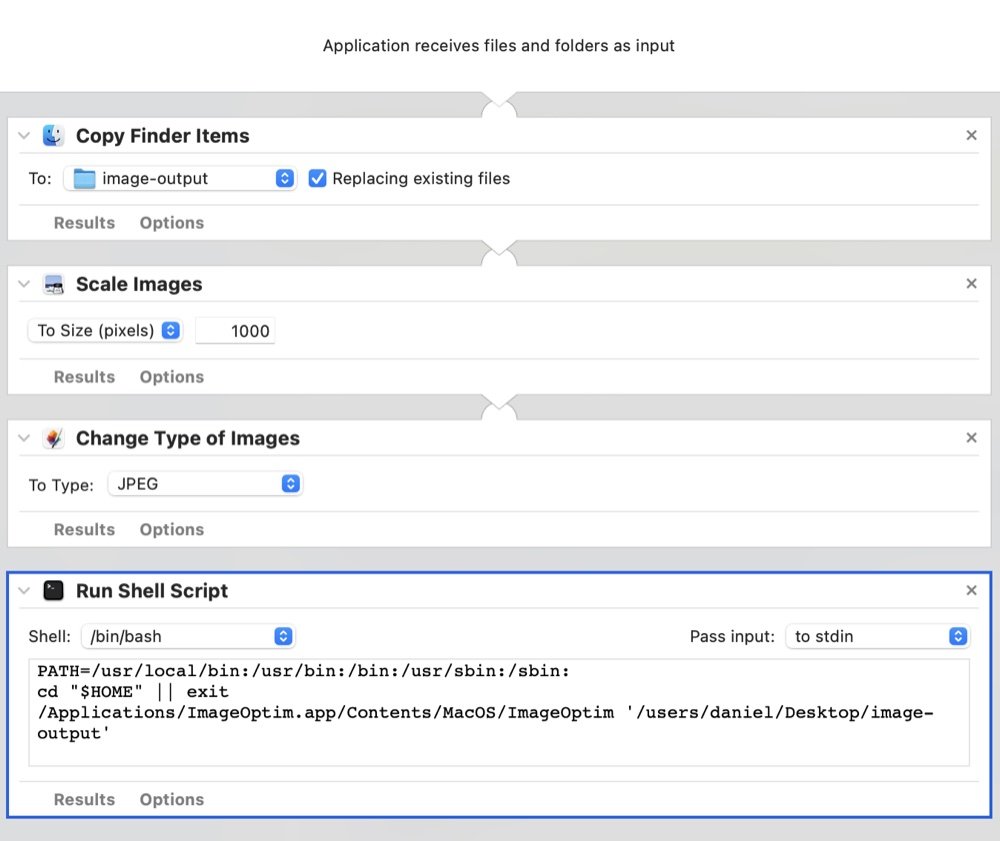
Open Automator (it comes with your Mac) and create a new Automator Application; like this one:

PATH=/usr/local/bin:/usr/bin:/bin:/usr/sbin:/sbin:
cd "$HOME" || exit
/Applications/ImageOptim.app/Contents/MacOS/ImageOptim '/users/daniel/Desktop/image-output'
(Change the shell script to your name instead of "daniel":wink:
Save the autormator app to your desktop as "Web Compress Image". Done!
What does it do:It creates an app on your desktop called "Web Compress Image", when you drag and drop an image onto that app it will..
- Copy the image into a new folder so the original is not changed.
- Resize the image to a max of 1000px wide (plenty big enough for any website)
- Convert the image to a jpeg so it loads faster on the web
- Runs ImageOptim on the image so that its fully compressed.
You can then upload the new compressed image to your website, and it was all done in one mouse move!
Handy extra tip: If you use
Transmit for uploading files, you can go to Servers/Save as Droplet and make a ":grin:roplet" app that allows you to drag your image onto the droplet where it will be automaticity uploaded and a link will be copied to your clipboard!


 Posts & Arts: 69/1k.beats

 Thank you for today!


 Author


