Heya, I don't know if this is possible using PURELY HTML/CSS, but it's VERY possible once you mix in some basic Javascript (which is usable pretty much anywhere you can use HTML/CSS, even static site hosts)!
You can do this with some checkboxes and a button that triggers a JS function. Consider this example:
<div id="checkbox-container">
  <label>
    Show Blue Elements
    <input type="checkbox" id="blue-elem-check" name="blue-elem-check" value="Blue" checked>
  </label>
  <label>
    Show Red Elements
    <input type="checkbox" id="red-elem-check" name="red-elem-check" value="Red" checked>
   </label>
   <label>
     Show Yellow Elements
     <input type="checkbox" id="yellow-elem-check" name="yellow-elem-check" value="Yellow" checked>
   </label>
   <button type="button" onclick="colorFilter()">Filter</button>
</div>
<div class="blue"></div>
<div class="yellow"></div>
<div class="red"></div>
<div class="blue"></div>
<div class="yellow"></div>
<div class="red"></div>
And this CSS to style it:
#checkbox-container {
  display: flex;
  flex-direction: column;
  margin-bottom: 50px;
}

.checkbox-container label {
  padding-bottom: 5px;
}

.checkbox-container button {
  width: 80px;
}

.blue, .red, .yellow {
  width: 50px;
  aspect-ratio: 1 / 1;
}

.blue {
  background-color: blue;
}

.red {
  background-color: red;
}

.yellow {
  background-color: yellow;
}
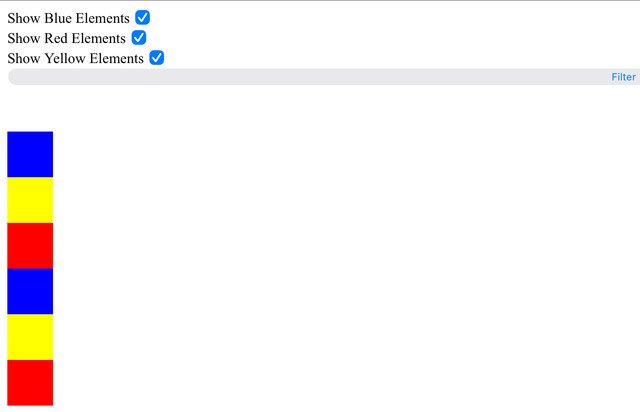
With this, you'll end up with a page looking like this, with checkboxes for each type of element, then the elements themselves.

When you click the Filter button, it will call a javascript method "colorFilter()". We can write that method as such:
function colorFilter() {
  var showBlue = document.getElementById("blue-elem-check").checked;
  var showRed = document.getElementById("red-elem-check").checked;
  var showYellow = document.getElementById("yellow-elem-check").checked;

  var blueElements = document.getElementsByClassName("blue");
  var redElements = document.getElementsByClassName("red");
  var yellowElements = document.getElementsByClassName("yellow");

  for (var i = 0; i < blueElements.length; i++) {
    var currentElement = blueElements[i];
    if (showBlue == true) {
      currentElement.style.visibility = "visible";
    }
    else {
      currentElement.style.visibility = "hidden";
    }
  };
  ...[Repeat for loop for the other colors, changing the variable names for each class you have]
}
With this, by checking and unchecking each type of element (denoted by their html class attribute) then hitting the Filter button, you can toggle visibility for any number of categories. You can then go on to style this and add CSS animations if you want the hiding and showing to be a bit prettier.
If you wanna mess with it, here's a JSFiddle you can use to test it and try other styling or adding images:
https://jsfiddle.net/r4nd2zhy/1/


 Posts & Arts: 46/1k.beats

 ~~~~~~~~~~~


 Author


